
First i cut out 2 guitar pick shapes from 20 gauge bronze. I like to use 20 gauge when i make things from bronze as the metal is very hard and 18 gauge takes a while to cut out. 20 gauge here is more then enough. However if i use copper or sterling silver i tend to use the 18 gauge which is thicker. I use a normal jeweler saw with 1/0 saw blades.


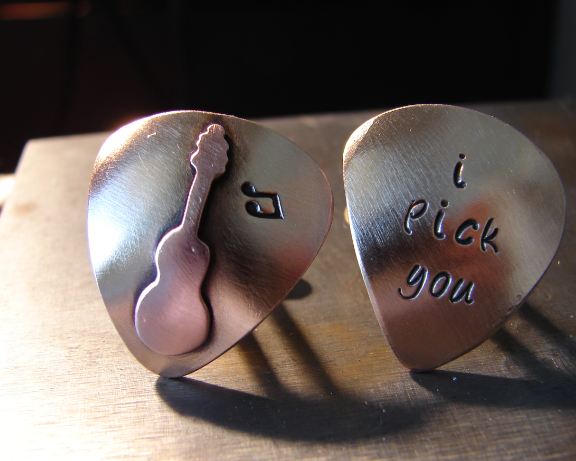
Now this design was requested from a customer of mine, featuring one cuff link with just i pick you stamped into the surface and the other cuff link with a soldered on guitar and a music note stamped next to the neck. I love to mix metals so i used 18 gauge copper for the guitar . The design was drawn freehand onto the copper sheet. ( 18 gauge is about 1 mm thick) . You can see the difference between both metals. The copper has a nice reddish color to it and the bronze is a yellow gold tone.


The first picture shows my "workbench" a converted heavy bar stool that i got cheap at Walmart. It is very sturdy and heavy so it does not tip over i actually prefer working on it even though the surface is tiny. Second picture shows me sawing out the shape of the guitar by hand with my trusted jewelers saw. With heavy use expect the saw itself to last about 1 - 1 1/2 years. When you saw out shapes by hand keep in mind not to "push" the saw as the fine blade will brake very easy. Lightly move the saw up and down and around corners try to "jogg" the blade which means don't push at all just turn the blade lightly in the direction you are going. When i first started sawing by hand i broke my blades constantly and i got frustrated on more then one occasion. Now i brake a blade after sawing out several shapes. The 3rd and 4th picture show you how small the guitar is.

my "honest" worker hands. Black nail polish will hide anything stuck under your nails or discoloration from chemicals > notice also the bandaid. I have at least one on my fingers at all times. Saw blades are very sharrp!!


I check if Guitar pick shape and guitar fit together in size. After doing it for a couple of years i do not measure anymore and i never have to cut twice :). Second picture shows my trusted Torch. I use Acetylene and Air. That works well with me but there are other choices out there. I found this the easiest and i do not like butane i find that the flame does not get hot enough and soldering takes forever. I am not a very patient person so i found products that fit me well and make things easier for me. Same goes with the Silver paste solder i use that all the time . It is a paste that gets applied after you cleaned your metal of course. that is one of the rules to obey by. Always clean your metal with sand paper before soldering or the solder will not flow correctly. There are many different solders out there i use the paste most of the time as the paste also works like a little glue it sticks both metal pieces together so they don't move to much. I also use wire solder for more elaborate designs and for rings. Last picture is the piece after soldering and quenching in water.


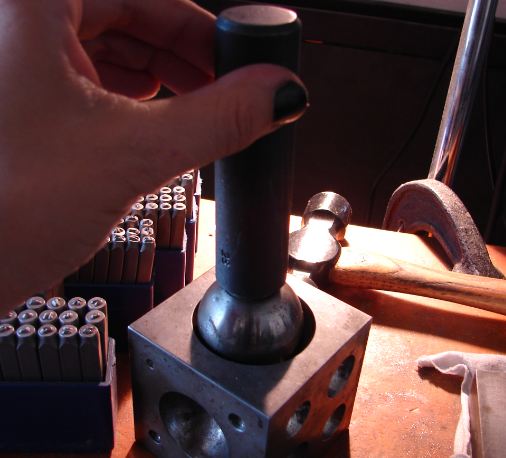

Before you dab the piece you can add your stamping. I put the music note next to the neck and added the i pick you quote on the other cut out shape. Now you can be done with it and solder on the actual link for the cuffs and leave the pieces flat but i personally like dabbing and giving more dimension to jewelry. That steel block with the round indentations you see is called a Dabbing block and has corresponding steel ball on a stick ( don't know what you call those ...maybe dabber? )
you put your piece face down into the largest indentation your piece fits without going over the edges put the ball on a stick on top ( put the piece face down or you have your design on the inside instead of the outside ) and then hammer with a heavy hammer on the stick a couple of times. Voila a rounded shape emerges. So much fun!!!


Clean your shape on the inside both of the links. Remember cuff links come in a pair :)
apply solder paste to the base of your actual link for the cuffs. Now really important is that you use metal that is not plated and meant be be soldered. Plated metal will not work those you have to attach via glue and there is no fun in that and a true metal smith will never use glue to attach 2 pieces of metal. Chose a solder paste or stick or sheet solder that has a lower melting point then the previous you used. Or your guitar will fall off before you are able to solder the link together . I have been doing this a while so i know exactly when to draw my flame away so that does not happen so i use the same solder. To keep the link upright i use a third hand a very "handy" tool if i may say so.
After soldering quench in water and put into a pickle solution. Most people use the pickle in a crock pot to heat it as it will work the best. However i live in AZ and it is hot enough even without a crock pot so i do not use that. Keep the cuff links in there for 1/2 hour rinse and wipe and check if ou got all the oxidation off. The more you get off the easier is the polishing.


First three pictures show you the unpolished cuff links and the 2 others is one polished and the other is not. Before you polish smooth the edges with a file to make it even. When i polish i love to use my flexshaft with different polishing wheels with different grids. i start with an 80 grid which gives it a nice satin finish. I tend to leave it as that and don't polish to a high shine as i love the texture and brushed finish of the 80 grid. If you prefer a nice high polish you go through the grids in order from 80 to 5 micron.
Please safety first. Always wear goggles a mask and safety glasses when polishing and bind any hair back in a ponytail. I still have a little bald spot hidden from where the wheel caught and ripped out a nice lock of hair fortunately for me it was in a spot that is well hidden but dang it hurt .....a lot!!!!!!


After the first round of polishing ( don't forget the back site ) add patina and polish again. The proceed to take pictures to proudly show of what you managed to make.
hope you liked that little tutorial .......
nici laskin


