Saturday, September 15, 2012

Sterling Silver Star Ring Design - Nici's Custom Guitar Picks and Jewelry

Sterling Silver Star Ring Design - Nici's Custom Guitar Picks and Jewelry 

This beautiful sterling silver star ring is in search of a perfect finger or toe. The ring started as a flat strip of metal sheared from thick 16 gauge sterling silver and was formed into a perfect ring by hammering over a steel mandrel. As a focal point, a large shining star with smaller stars on both sides was stamped into the sterling silver and enhanced with a gray patina for contrast against the warm glow of burnished sterling silver. The edges and end tabs were filed and rounded by hand to maximize comfort.

Sterling Silver Twinkling Star Pendant - Nici's Custom Guitar Picks and Jewelry

Sterling Silver Twinkling Star Pendant - Nici's Custom Guitar Picks and Jewelry

Friday, August 17, 2012

cloisonne jewelry by Lanni

check her out she has such a unique way of making cloisonne jewelry i love it

Jewelry making has become a passion of mine. I find the quiet time spent in my small studio to be incredibly relaxing and satisfying.
I have four children that get bigger everyday and it’s difficult to find the time to “work”. The definition of the word work to some people could be something not very enjoyable, but I’m happy to say that I love what I do.
I graduated from Syracuse University with a Fine Arts degree. At the time I studied photography, but as an art major I spent time learning about different art forms. Since school I’ve spent time working in photography, graphic design, cake decorating and of course all the arts and crafts you could think of doing with kids. Life wouldn’t be complete if I couldn’t use my hands to express myself.
Like the majority of jewelers, I started out using beads. The colors are beautiful and I feel as though I’m a child in a candy shop when I visit a bead store. I moved onto incorporating silver wire with my beads. As my skills developed my work became more complex. I am now using both silver smithing techniques and enameling to create my current line of jewelry.
My jewelry is made of a fairly new type of Sterling Silver called Argentium Silver, this silver tarnishes at a much slower rate then the standard Sterling Silver. I also have started to incorporate gold into my work. I love the contrast of different colors metals and plan to continue using the two as I design more jewelry.

Saturday, June 16, 2012


We are in New Jersey after our 6 day road trip there from Phoenix, AZ and i am all set up. I like the view out of the windows and i have glass french doors here, lots of space and we can eat at the dinning table now :).

Wednesday, May 30, 2012

New Jersey , a full loaded car, hubby and dog all my tools, all his tools , from Phoenix AZ all the way to New Jersey, Uh boy , can anyone say ROAD TRIP , we are in Sedona, AZ right now, hubby is mountain biking and i am sitting in a nice little cafe with a cup of Late and my dog right next to me, since hitting the road i sold 15 things, LOL, figures, last couple of days were slow but it is picking up big time, we are taking our time so i have 2-4 hours each day to fill orders,
will see ya in 1 week in good old New Jersey

( that happens when you marry an American , at least that is what my mom told me )

Wednesday, May 23, 2012

Yes, we are going ( like every year ) for the summer to New Jersey. In the car. With the dog in the back.

Saturday, May 5, 2012

Doodles


I discovered the drawing program at DeviantArt. That is so so neat. Love doodling and i cannot stop .

http://nicilaskin.deviantart.com/

Wednesday, May 2, 2012

Customer Review

Metal Picks by Nici Laskin

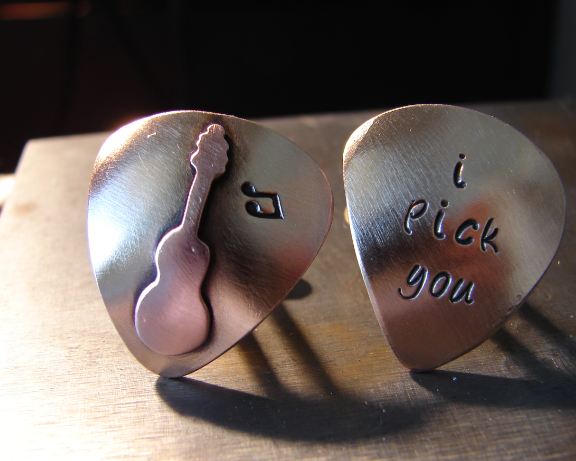
As soon as I received my picks in the mail, I started unwrapping them instantly and was instantly in love with them: they were crafted to absolute flawlessness. No hard edges, no dents, all in all greatly done. The picks are slightly larger than a regular celluloid pick, but that just means there's more to grab on to, it doesn't get uncomfortable at all. During my testing I used an Ibanez JS1000 with 2 Dimarzio PAF Pro's run through a Laney TT50H. I also used a Yamaha Pacifica 112J with stock pickups for the drop D and drop C testing.

I received a bronze, aluminum and copper pick, which all had their own specific qualities. In comparison to a normal celluloid pick, they all made the sustain on the guitar longer, with copper being the best in that category. aluminum came closest to sounding like a regular pick, but having the same advantages of a metal pick (which I will talk about later). The sound doesn't really change all that much comparing to celluloid, except for a little more brightness. The pick is also really light, much like the weight of a normal pick.
The bronze pick offered a bit more sustain that the aluminum one and also added a little bit of brightness to the sound. It can sound very warm too when you play it close or over the fretboard, but the difference is very obvious played right next to the bridge. I imagine this difference will be even greater when playing with a very heavy single cut guitar, like a Les Paul.
My favorite one is absolutely the copper pick. This one looks just amazing, radically different than a regular pick and it feels super awesome. It's got a lot more weight to it, making playing guitar a lot more challenging sometimes, but it's very good for playing heavy riffs in drop D for example. The sound of the pick is very bright and the most defined compared to the other two. It also gives the longest sustain of all three picks, which is one of the main reasons why I like it the most.

Now let's talk about some cool techniques you can do with these metal picks! To start of we'll take your regular pick scrape: you brush the pick over the strings up or down to make a scratching sound, which sounds pretty cool, right? Well, the metal picks amplify the effect of the pick scrape, making it sound a lot fuller and more organic. Also, you can speed up or slow down while doing your pick scrape and the sound will stay very hard, unlike celluloid that tend to have a weakened sound when you slow down with the scrape.
Natural harmonics ring louder and way clearer with these metal picks of win, so get ready to make some awesome soundscapes! Add some delay and reverb and you're on your way to some massive sounds!
One of my favorite things to do with the picks is to use them as a bottleneck slide replacement: put the pick sideways on the strings and play with your fingers to pick the notes. Because of the metal, the sound will keep ringing and you will get the same effect as if you were using a bottleneck slide. There is also a small difference in tone depending on the kind of metal, the aluminum gives some warping sound that rings through your notes, but also has the least sustain. The bronze pick has the clearest sound of them all, without giving any other feedback, while the copper pick seems to add more buzz to your sound, which can sound really cool, depending on genre and preference.
Another fun thing to do, is to tap your strings with the side of the pick above and between the pickups, making some crazy robot-like tones by just tapping. When using enough distortion, you can also rub the upper strings to create some ghostly effect.
Continuing from the last 2 techniques, when you use those in combination at your fretboard while pick-tapping, you can pick tap and slide at the same time, creating some nice possibilities while playing.

All the techniques described above can be used with some added effect pedals to create even more amazing, creative and original sounds. Over all, these picks are a must have for the experimental guitarist that wants to try something a little more challenging than buying a new FX pedal.

Tim Verheyden

Sunday, April 29, 2012

Cuff links the beginning to the end


First i cut out 2 guitar pick shapes from 20 gauge bronze. I like to use 20 gauge when i make things from bronze as the metal is very hard and 18 gauge takes a while to cut out. 20 gauge here is more then enough. However if i use copper or sterling silver i tend to use the 18 gauge which is thicker. I use a normal jeweler saw with 1/0 saw blades.


Now this design was requested from a customer of mine, featuring one cuff link with just i pick you stamped into the surface and the other cuff link with a soldered on guitar and a music note stamped next to the neck. I love to mix metals so i used 18 gauge copper for the guitar . The design was drawn freehand onto the copper sheet. ( 18 gauge is about 1 mm thick) . You can see the difference between both metals. The copper has a nice reddish color to it and the bronze is a yellow gold tone.


The first picture shows my "workbench" a converted heavy bar stool that i got cheap at Walmart. It is very sturdy and heavy so it does not tip over i actually prefer working on it even though the surface is tiny. Second picture shows me sawing out the shape of the guitar by hand with my trusted jewelers saw. With heavy use expect the saw itself to last about 1 - 1 1/2 years. When you saw out shapes by hand keep in mind not to "push" the saw as the fine blade will brake very easy. Lightly move the saw up and down and around corners try to "jogg" the blade which means don't push at all just turn the blade lightly in the direction you are going. When i first started sawing by hand i broke my blades constantly and i got frustrated on more then one occasion. Now i brake a blade after sawing out several shapes. The 3rd and 4th picture show you how small the guitar is.


my "honest" worker hands. Black nail polish will hide anything stuck under your nails or discoloration from chemicals > notice also the bandaid. I have at least one on my fingers at all times. Saw blades are very sharrp!!


I check if Guitar pick shape and guitar fit together in size. After doing it for a couple of years i do not measure anymore and i never have to cut twice :). Second picture shows my trusted Torch. I use Acetylene and Air. That works well with me but there are other choices out there. I found this the easiest and i do not like butane i find that the flame does not get hot enough and soldering takes forever. I am not a very patient person so i found products that fit me well and make things easier for me. Same goes with the Silver paste solder i use that all the time . It is a paste that gets applied after you cleaned your metal of course. that is one of the rules to obey by. Always clean your metal with sand paper before soldering or the solder will not flow correctly. There are many different solders out there i use the paste most of the time as the paste also works like a little glue it sticks both metal pieces together so they don't move to much. I also use wire solder for more elaborate designs and for rings. Last picture is the piece after soldering and quenching in water.


Before you dab the piece you can add your stamping. I put the music note next to the neck and added the i pick you quote on the other cut out shape. Now you can be done with it and solder on the actual link for the cuffs and leave the pieces flat but i personally like dabbing and giving more dimension to jewelry. That steel block with the round indentations you see is called a Dabbing block and has corresponding steel ball on a stick ( don't know what you call those ...maybe dabber? )
you put your piece face down into the largest indentation your piece fits without going over the edges put the ball on a stick on top ( put the piece face down or you have your design on the inside instead of the outside ) and then hammer with a heavy hammer on the stick a couple of times. Voila a rounded shape emerges. So much fun!!!


Clean your shape on the inside both of the links. Remember cuff links come in a pair :)
apply solder paste to the base of your actual link for the cuffs. Now really important is that you use metal that is not plated and meant be be soldered. Plated metal will not work those you have to attach via glue and there is no fun in that and a true metal smith will never use glue to attach 2 pieces of metal. Chose a solder paste or stick or sheet solder that has a lower melting point then the previous you used. Or your guitar will fall off before you are able to solder the link together . I have been doing this a while so i know exactly when to draw my flame away so that does not happen so i use the same solder. To keep the link upright i use a third hand a very "handy" tool if i may say so.
After soldering quench in water and put into a pickle solution. Most people use the pickle in a crock pot to heat it as it will work the best. However i live in AZ and it is hot enough even without a crock pot so i do not use that. Keep the cuff links in there for 1/2 hour rinse and wipe and check if ou got all the oxidation off. The more you get off the easier is the polishing.


First three pictures show you the unpolished cuff links and the 2 others is one polished and the other is not. Before you polish smooth the edges with a file to make it even. When i polish i love to use my flexshaft with different polishing wheels with different grids. i start with an 80 grid which gives it a nice satin finish. I tend to leave it as that and don't polish to a high shine as i love the texture and brushed finish of the 80 grid. If you prefer a nice high polish you go through the grids in order from 80 to 5 micron.
Please safety first. Always wear goggles a mask and safety glasses when polishing and bind any hair back in a ponytail. I still have a little bald spot hidden from where the wheel caught and ripped out a nice lock of hair fortunately for me it was in a spot that is well hidden but dang it hurt .....a lot!!!!!!


After the first round of polishing ( don't forget the back site ) add patina and polish again. The proceed to take pictures to proudly show of what you managed to make.

hope you liked that little tutorial .......

nici laskin

Tuesday, April 24, 2012

Glass Artist Wendy Williams


 Take a look at my favorite Glass Artist on Etsy. Wendy Williams. I love what she does with glass.

I discovered Flameworking while living in Hawaii. I walked into a little Glass Shop in Lahaina Towne in answer to an ad. I was looking to purchase a used car from one of the employees. I fell in Love with the shop, the sound of the Torch Whistling loudly in the background, the site of the sparkling glass sculptures lining the Koa Wood Walls, and the feeling of excitement in the air. I was hooked at first sight!

I went to work for them several months later and started learning the technique of melting/shaping glass rods in the Flame of a Very Hot Torch.

After several Years I struck out on my own and opened my first studio in my garage. I have sold my Sculptures in many different Galleries in Hawaii, California, Texas, Florida, and South Carolina.

I started creating Jewelry while living in Florida in 2004.It really just happened because I needed something to wear and had no time to shop. I needed a necklace. So I made one. The same thing is true for Bracelets and Rings. I made them for myself and ended up having others ask me to make one for them, and so it began.

Glass Fascinates me!! Any and all of it! I Love the Movement of it, The Flow, The way it feels in my hands. When it is Glowing Red Hot it is Mesmerizing.

There is a definite timing to glass. After many years I have developed a "Feel" for it or a sense of what is about to happen before it happens. It needs to be heated to the point that it can be manipulated but, if I heat it too much I’ll have a disaster.

Glass can be very temperamental. It seems that some days it has a mind of its own. Some days it is in my best interest to turn the torch off and walk away. Cuts and Burns do happen. It’s just part of the job.

The colors have a mind of their own too. Most of the colored Rods and Frits have a wide range of hues that they can render. It depends on the Heat used, the temperature outside, or how long I anneal it. One Rod in particular is one of my favorites. It can be a Bright, Iridescent Yellow to a Smokey Fuchsia Pink!

Every Morning when I open the Kiln I can see the Results of my work from the day before. It is then that I get to see what colors came to life. It’s like having Christmas every morning.

One of the hardest things for me to overcome when I first started out was the desire to reach my hands out, toward the flame, and tweak the sculpture a little bit. I burnt my finger prints off many times.

I think that if I lived three lifetimes I would never exhaust all of the possibilities of working with glass. Every Day brings a new adventure. I learn something new all the time!!

("Wendy Williams")

http://www.etsy.com/shop/Morninglightglass?ref=seller_info